


First things first. Let's quickly go over what you will receive in your Panel Mini package. You will find: a Panel Mini, a USB-C recharge cord, a silicon diffuser, a low-profile DSLR mount, and of course, the trusty quick start guide.
To turn on the Panel Mini, you simply hold the blue power button for three seconds and it will turn on.
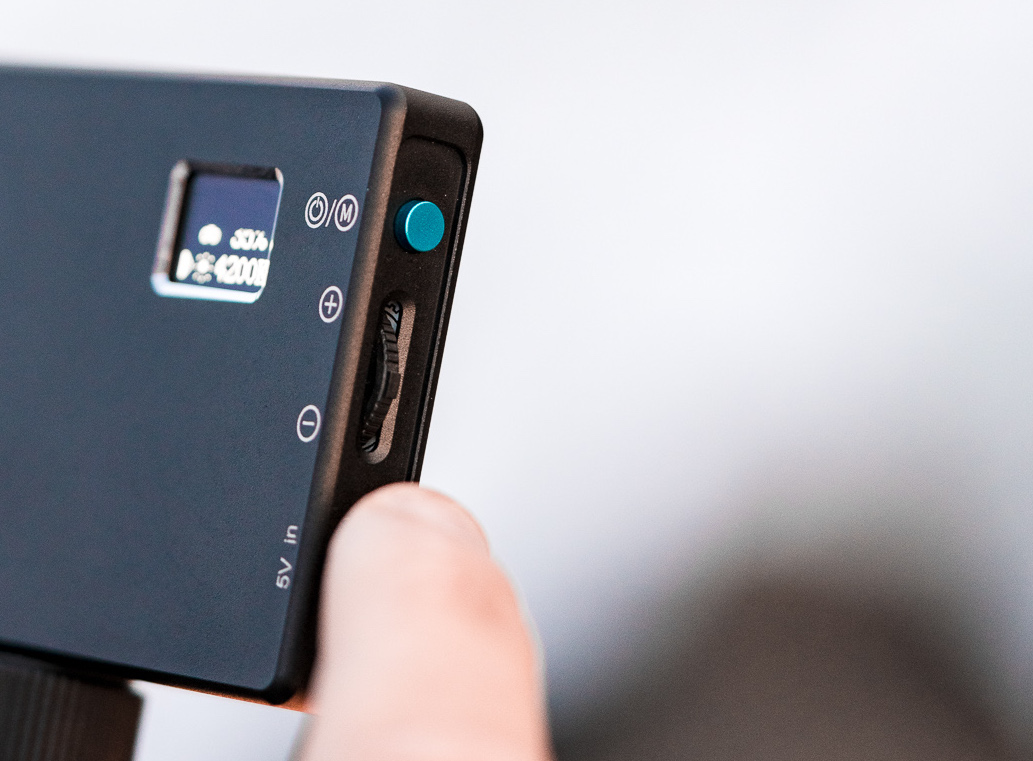
The Lume Cube Panel Mini is a bi-color LED. This means that you can adjust the color temperature from 3200K (warm) to 5600K (daylight). So, once you have the device turned on, you will see the LCD control screen turn on. This screen is on the backside of the light in the top right corner.

The LCD control screen displays battery life, color temperature, and the brightness setting you're currently at.
To adjust the color temperature, tap the blue power button once and a small arrow will land on the color temperature section. Then, use the dial on the side to adjust the color by going up or down. Going up will change the color of the light in 100K increments and will become more of a white light. As you lower the color temperature, the light will become more orange and warm.

To adjust the brightness, tap the blue power button and a small arrow will land on the brightness adjustability section. Then, turn the dial up to increase brightness by 5% increments all the way up to 100%. Turn the dial down to decrease brightness all the way to 1% (great for night and long exposure photography!)
As you change the brightness intensity, it is important to keep in mind that the LCD display screen on the back of the light indicates the amount of time left on your battery at this given brightness mode. You will know exactly how long your lighting will last at any given brightness. If you need it to run it for longer durations, simply keep it plugged into a charging bank and run it indefinitely.

At 100% brightness, you will get 1.2 hours of battery life. Then, at 1% brightness, you will get 14 hours of run time.
When it comes to recharging your Lume Cube Panel Mini, it takes 1.8 hours to recharge. To recharge the Panel Mini, locate the USB-C recharge port on the side of the light and simply insert the USB-C charging cable. On the back, you will see the battery indicator that tells you it is recharging.
For best charging practices, be sure to unplug the device once it's fully recharged. And if you have not used your Panel Mini in awhile, make sure to recharge it before your next shoot.


We hoped this helped you get a better understanding of how to best use the Panel Mini ! If you have any other questions, please feel free to reach out to support@lumecube.com.