


Full Video Transcription Below
Hey guys, Trevor here to break down our upgraded RGB Panel Pro 2.0
The Panel Pro has been our flagship on-camera light since it debuted in 2020. The combination of your feedback and advances in LED technology have allowed us to upgrade the light to what you see here today - the RGB Panel Pro 2.0. Redesigned to better suit the on the go creator, The RGB Panel Pro 2.0 is brighter, lasts 20% longer, has tint control, is more accurate with a CRI of 96, and has a wider bi color range than its predecessor. And my favorite, it also can double as a power bank to charge up your other gear.
In this video, we’ll break down all you need to know about the Panel Pro 2.0 including how to use and operate it. Let's get into it!
_________________________________________________________________________
What’s Included
First we’ll start with what’s included:
Inside the RGB Panel Pro 2.0 box you will receive:
- (1) Lume Cube RGB Panel Pro 2.0
- (1) Softening Diffuser
- (1) DSLR Camera Mount
- (1) USB-C to USB-A Cable
- (1) Travel Pouch
_________________________________________________________________________
Physical Features
The 2.0 is built to thrive wherever you take it. The redesigned aluminum body is sleeker, more ergonomic, yet extremely durable and drop proof. It features 204 powerful LEDs tucked behind it’s frosted lens with an upgrated bi-color output that is 11% brighter and an RGB output that’s 400% brighter than the original.
On side, we have our blue mode button, an adjustment dial, a new power switch, and the USB-C charging port. This is also where you can use the light as a power bank.
The 2.0 stands tall at 6” wide by 3.14” tall by .43” thick allowing it to go virtually unnoticed in the gear bag.
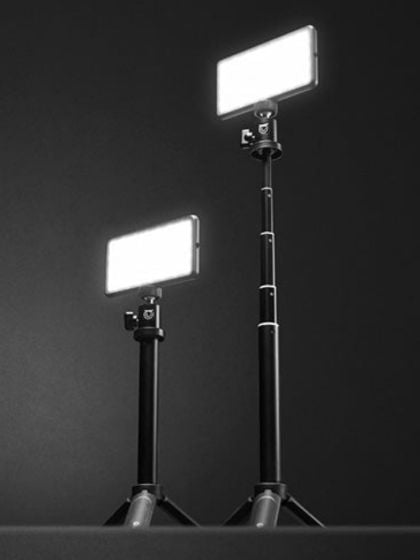
The 2.0 features three ¼” 20 threads, one on top, one on bottom and one on the left side of the light. Making it easy to mount to any ¼ 20 mounting device, like the included cold shoe mount.
_________________________________________________________________________
How To Use
Now that we know our way around the light, lets dive into how to use it.
The 2.0 comes equipped with over 16 million colors, a 2700K - 7500K bi color range, green/magenta tint control, built in effects, strobe speeds, and more.
Draw your attention to the back screen of the panel. This is your control center where you can see and adjust your settings using the buttons on side to find the right light in any environment. On this screen you can also see some battery information including estimated time remaining.
To operate the light, hit that power switch and your light will turn on. Checkout your back screen to see your current settings. Use the mode button to toggle through your adjustment settings. You’ll want to keep an eye on this little arrow. Once the arrow lands on your desired section, you can use the adjustment dial to adjust that setting.
When the menu is highlighted yellow you can use the dial to toggle between the different light modes. Once you’re ready to jump into that mode, press the blue button to begin toggling between the settings below.
Under the HSL/SET menu you can control the brightness, color, saturation, and Bluetooth functionality of your light.
LEVEL controls brightness from 0 to 100%
COLOR control the hue of the light from 0 to 360
SAT controls the saturation light from 0 to 100
And BT toggles the bluetooth functionality on and off. To learn more about how to connect your device to the Lume Control app check out our Lume Control App video.
Switching over to the CCT/FX menu, this is where you can control brightness, color temperature, Green/Magenta tint, and our Pre-programmed effects.
Just as the previous menu LEVEL controls brightness from 0 to 100%
TEMP. controls the lights temperature range from 2700k to 7500k
G/M controls the Green/Magenta tint from -1 to 1.
SCENE controls the 7 pre-programmed light effects that include: STROBE, LIGHTNING, FIRE, CANDLE, SIREN and TV
FREQUENCY controls the speed of your effect with a range of 1Hz to 10Hz.
Battery Life
In the top right of the LCD screen you’ll see a little battery icon. This is your battery indicator. The numbers to the left show how much time you have left before your light runs out of power. When adjusting brightness these numbers will change. The lower the brightness, the more time you will have and the higher the brightness the less amount of time.
Charging
To charge the RGB Panel Pro 2.0 battery simply plug in the included USB-C power cable into a power source and the USB-C port on the light. Once charging, you will see this battery indicator here.
Keep in mind, the 2.0 can also double as a power bank. Just plug in any USB-C compatible cable to recharge your phone, camera, air pods, or whatever gear that needs some juice.
_________________________________________________________________________
Bluetooth Setup
The 2.0 is bluetooth compatible and can be wirelessly operated through the Lume Control App.
First download the Lume Control app from the app store
On your light, Head to the menu labeled ‘HSL/SET’’, scroll down to BT and make sure the bluetooth is on.
Open the app, and head to the bluetooth pairing button and find your device. Tap the light icon on the far right and your light will connect. Once connected, you can find your device under the device list. Tap the plus sign to the left of your light to dropdown the full control menu.
There are some fun new advances in the Lume Control app, including a color picker where you can take a photo of an object and your lights will color match the image. We made a separate video to dive deeper into the Lume Control app.
If you’d like to learn more about it, check out our Lume Control App video.
Camera Mounting
To mount your panel to a camera, simply attach the included cold shoe mount to any of your panel’s ¼ 20 mounts and slide that on to your camera. Then, make sure to tighten the top disk to your light, and the bottom to your camera. Keep in mind, these three ¼ 20 threads make it very easy to mount your Panel Pro 2.0 to any existing mounts you may have.
Diffusion Lens
If you’re looking for an even softer light output, there’s also an attachable diffusion lens that comes with the light. Simply slide it over the front of your light to soften things up a bit.
_________________________________________________________________________
Well there you have it. A breakdown of how to use the New and Improved RGB Panel Pro 2.0
If you have any further questions we didn’t cover. Send us a message on social, reach to support@lumecube.com or post your comment on our Lume Cube Community Group on facebook.
We’ll see you next time.